How To Replace Brake Pads And Rotors (Front & Rear)
Generated guide based on video: Watch on YouTube
Materials Needed
- Wrench
- Socket wrench
- Screwdriver
- Mallet or hammer
- Brake cleaner
- Wire brush
- Brake pad piston compressor
- Lubricant (Mollie Coat M77 or DiColube 528D)
- Aluminum anti-seize compound
- New brake pads
- New rotors
- Torque wrench
Outcome: Successfully replaced brake pads and rotors on both front and rear wheels
Steps
Step 1: Loosen wheel lug nuts
Loosen the lug nuts on the wheels before lifting the car.
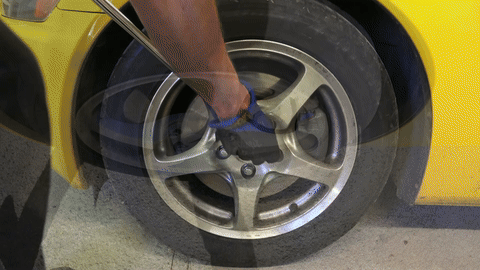
Shows the process of loosening the wheel lug nuts.
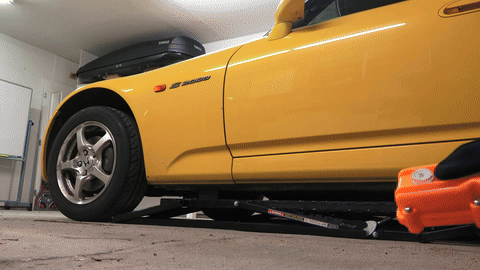
Step 2: Lift the car
Lift the car using the proper jacking points as per the owner's manual.
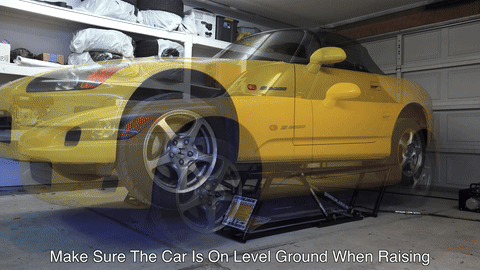
Illustrates the car being lifted using the correct jacking points.
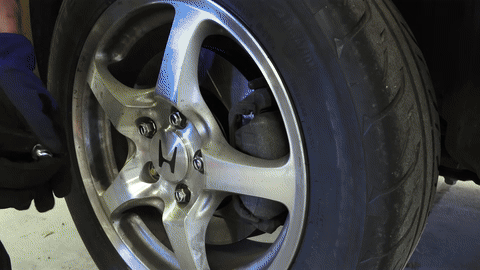
Step 3: Remove wheels
Remove the wheels to access the brakes.
Shows the removal of wheels to access the brake system.
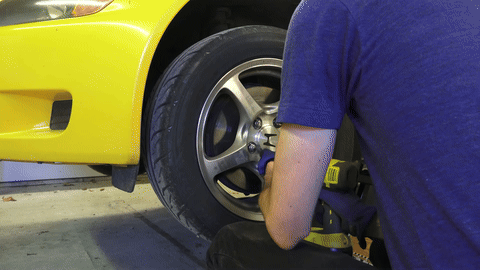
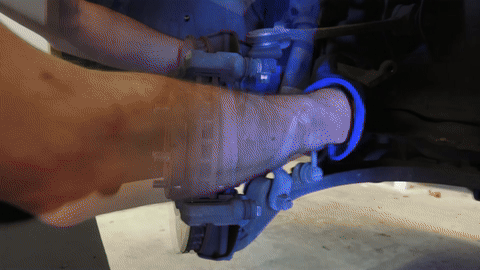
Step 4: Remove brake caliper
Remove the brake caliper by taking out the two bolts on the back side.
Demonstrates the removal of the brake caliper bolts.
Step 5: Remove brake pads
Take out the two brake pads from the caliper.
Shows the removal of brake pads from the caliper.
Step 6: Remove caliper bracket
Remove the caliper bracket by unscrewing the two bolts.
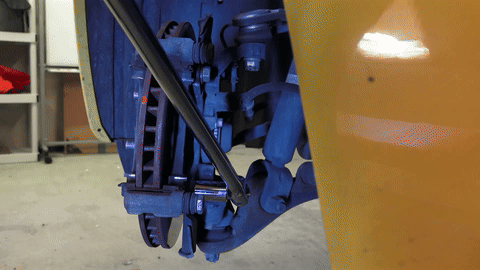
Demonstrates the removal of the caliper bracket.
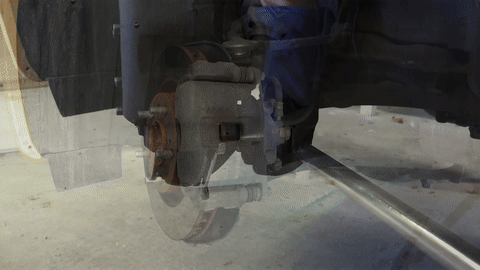
Step 7: Remove brake rotor
Remove the brake rotor by taking out any screws and breaking it free from rust if necessary.
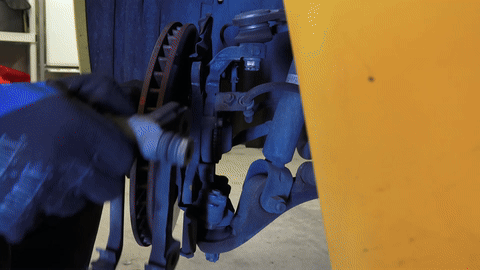
Shows the removal of the brake rotor.
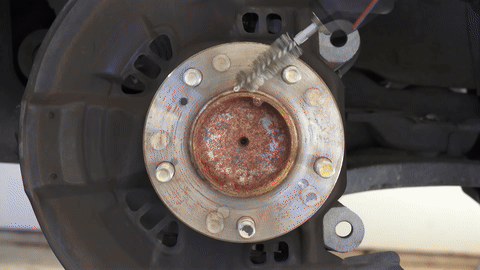
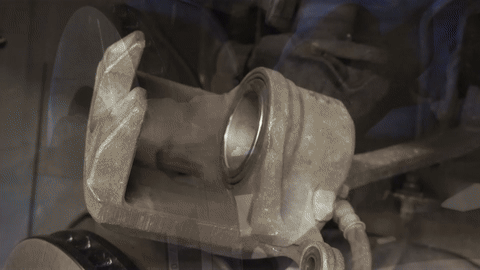
Step 8: Clean and prepare new rotor
Spray the new rotor with brake cleaner and clean the hub with a wire brush.
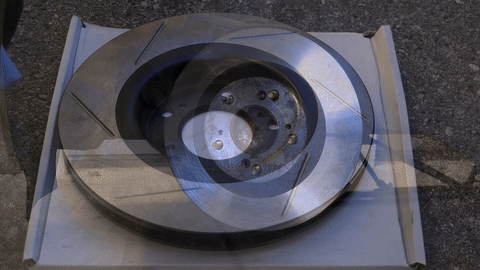
Illustrates cleaning the new rotor and hub.
Step 9: Install new rotor
Align and slide the new rotor into place, using a lug nut to hold it temporarily.
Shows the installation of the new rotor.
Step 10: Apply lubricant to brake pads
Apply the recommended lubricant to the back and sides of the new brake pads.
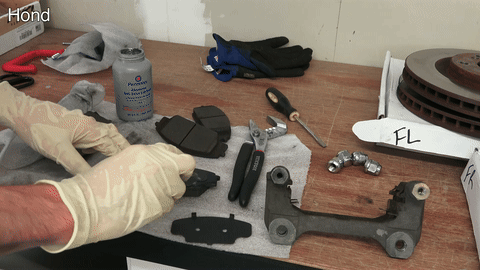
Demonstrates the application of lubricant to brake pads.
Step 11: Install new brake pads
Place the new brake pads into the caliper bracket.
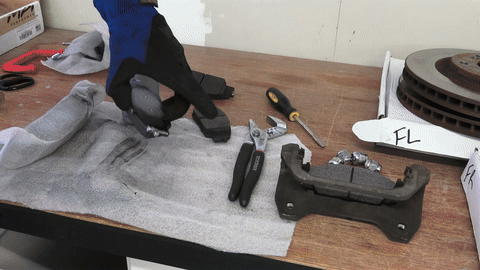
Shows the installation of new brake pads.
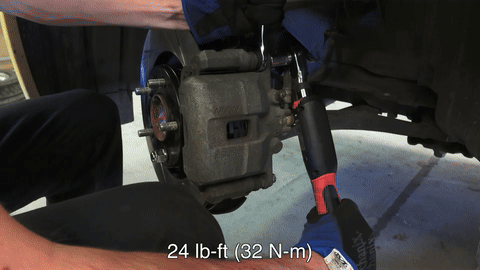
Step 12: Reattach brake caliper
Slide the caliper over the brake pads and secure it with bolts, torquing to specifications.
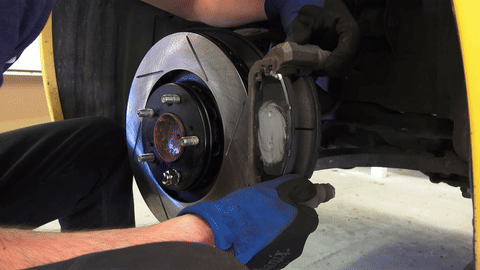
Demonstrates reattaching the brake caliper.
Step 13: Push piston back into caliper
Use a brake pad piston compressor to press the piston back into the caliper.
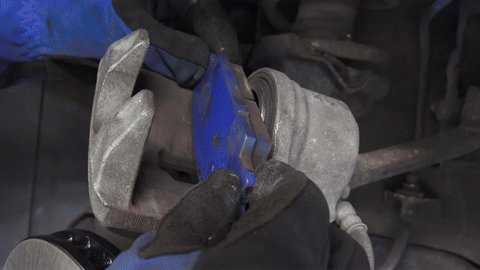
Shows the use of a piston compressor to push the piston back.
Step 14: Lubricate caliper pins
Ensure the caliper pins are lubricated and can rotate freely.
Illustrates the lubrication of caliper pins.
Step 15: Reinstall wheels
Put the wheels back on and tighten the lug nuts.
Shows the reinstallation of wheels.
Step 16: Lower the car and torque lug nuts
Lower the car and torque the lug nuts to the recommended specification.
Illustrates lowering the car and torquing lug nuts.
Step 17: Repeat process for rear brakes
Repeat the process for the rear brakes, noting differences such as the parking brake.
Shows the process for rear brakes with parking brake considerations.
Step 18: Pump brake pedal
Pump the brake pedal to set the caliper pistons before driving.
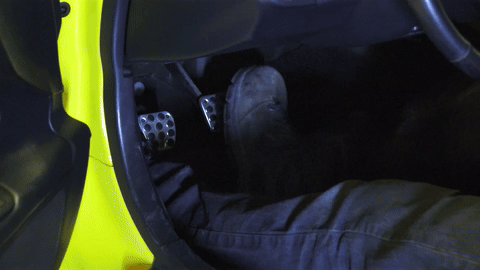
Demonstrates pumping the brake pedal to set pistons.