How to tie a tie - Quick and Easy
Generated guide based on video: Watch on YouTube
Materials Needed
- tie
Outcome: A neatly tied four-in-hand knot
Steps
Step 1: Position the tie
Hold the wide end of the tie in your right hand and the narrow end in your left hand, making the wide end twice as long as the narrow end.

Shows the initial positioning of the tie with the wide end in the right hand and narrow end in the left hand.
Step 2: Wrap the wide end
Wrap the wide end of the tie around the narrow end so that it ends up in the front.

Demonstrates wrapping the wide end around the narrow end, ending with the wide end in front.
Step 3: Form the loop
Push the wide end through the loop created by your neck.

Shows the wide end being pushed through the loop at the neck.
Step 4: Complete the knot
Push the wide end through the knot, ensuring everything is straight.
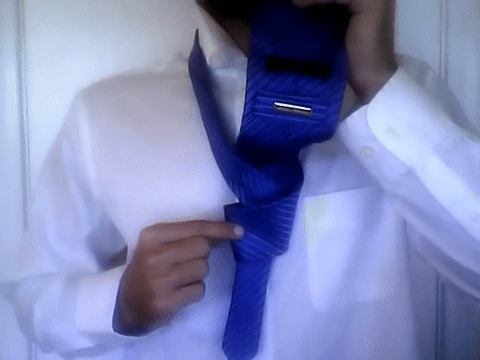
Illustrates pushing the wide end through the knot and straightening it.
Step 5: Tighten and adjust
Pull the narrow end to tighten the knot and adjust the collar over the tie.

Shows tightening the knot and adjusting the collar over the tie.