7 Essential Knots You Need To Know
Generated guide based on video: Watch on YouTube
Section 1: Square Knot
Learn to tie a square knot for binding purposes.
Materials Needed
- Rope
Outcome: A symmetrical binding knot with parallel ends.
Steps
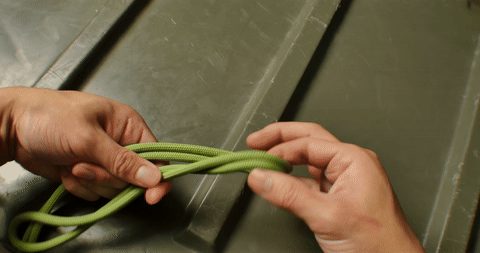
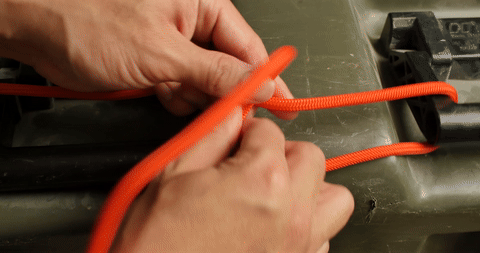
Step 1: Tie the first part of the knot
Go right over left with the rope ends.
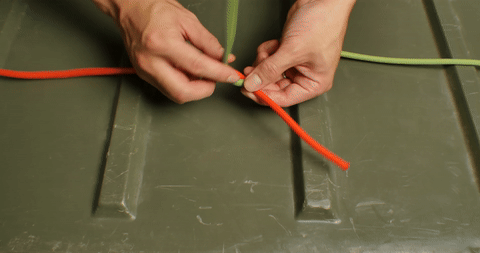
Demonstrates the first step of tying the square knot by crossing the rope ends.
Step 2: Complete the knot
Go left over right with the rope ends to form a symmetrical knot.
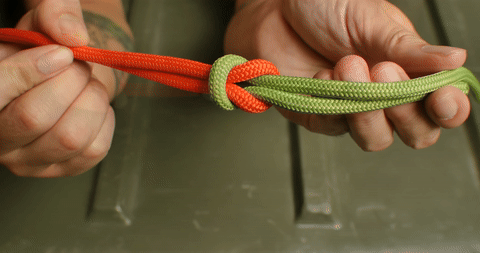
Shows the completion of the square knot, resulting in a symmetrical appearance.
Section 2: Clove Hitch
Learn to tie a clove hitch for securing a line to an object.
Materials Needed
- Rope
Outcome: A secure hitch with no binding or jamming.
Steps
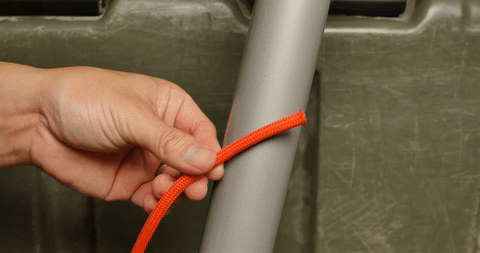
Step 1: Create loops
Twist the rope away from you to form two loops.
Shows the twisting of the rope to form the initial loops for the clove hitch.
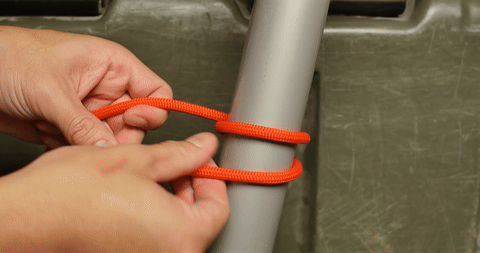
Step 2: Position the loops
Place the second loop on top of the first and secure over the object.
Demonstrates positioning the loops over each other and securing them on the object.
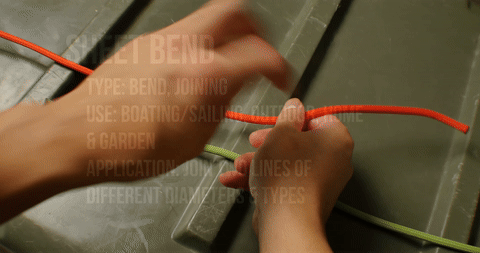
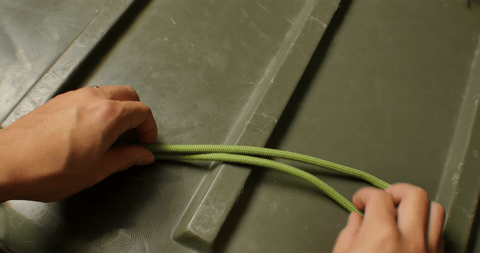
Section 3: Sheet Bend
Learn to tie a sheet bend for joining two lines of different diameters.
Materials Needed
- Two ropes of different diameters
Outcome: A secure joining knot for lines of different sizes.
Steps
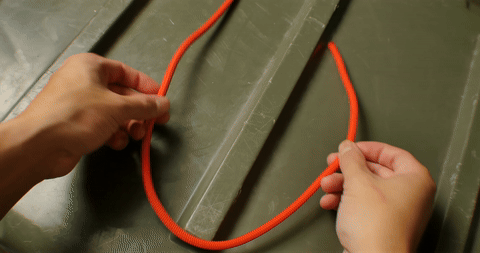
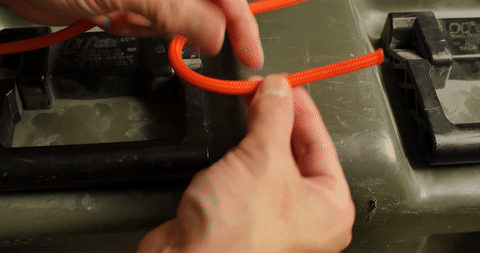
Step 1: Form a bight
Create a bight with the thicker rope.
Shows the formation of a bight with the thicker rope.
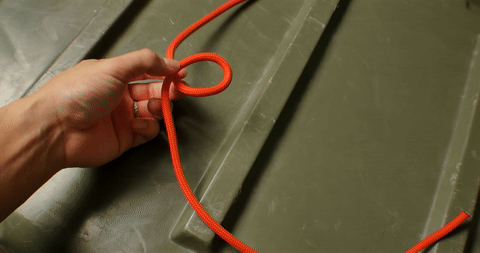
Step 2: Complete the bend
Pass the smaller rope through the bight, wrap around, and tuck underneath itself.

Illustrates the process of passing the smaller rope through the bight and completing the knot.
Section 4: Bowline
Learn to tie a bowline for forming a fixed loop at the end of a line.
Materials Needed
- Rope
Outcome: A fixed loop that is easy to tie and untie.
Steps
Step 1: Create an overhand loop
Form an overhand loop towards the working end of the rope.
Shows the formation of an overhand loop as the first step in tying a bowline.
Step 2: Complete the bowline
Bring the loose end through the loop, around the working end, and back through the loop.
Illustrates the steps to complete the bowline, forming a secure loop.
Section 5: Figure Eight Loop
Learn to tie a figure eight loop for a secure, non-slipping loop.
Materials Needed
- Rope
Outcome: A fixed loop that is unlikely to slip.
Steps
Step 1: Form the figure eight
Drape the bight over your hand, wrap around, and fish the bight through the eye.
Shows the initial steps of forming a figure eight loop by draping and wrapping the bight.
Step 2: Secure the loop
Bend the bight, twist twice, and bring it through the back to form the figure eight.
Illustrates the twisting and securing of the loop to complete the figure eight knot.
Section 6: Round Turn and Two Half Hitches
Learn to tie a round turn and two half hitches for securing a line to an object.
Materials Needed
- Rope
Outcome: A secure hitch for attaching a line to an object.
Steps
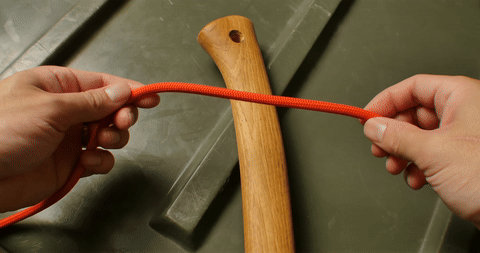
Step 1: Make the round turn
Wrap the rope around the object to form a round turn.
Shows the wrapping of the rope around an object to form a round turn.
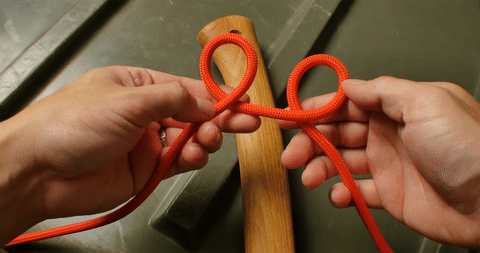
Step 2: Tie the half hitches
Bring the loose end under, over, and through the loop to form two half hitches.
Illustrates the process of tying two half hitches to secure the round turn.
Section 7: Tautline Hitch
Learn to tie a tautline hitch for adjusting tension on a line.
Materials Needed
- Rope
Outcome: An adjustable loop for tensioning a line.
Steps
Step 1: Form the initial loop
Pass the non-working end through the attachment point and form a loop.
Shows the initial loop formation by passing the rope through the attachment point.
Step 2: Complete the hitch
Make two passes inside the loop, form another loop, and pass through to secure.
Illustrates the completion of the tautline hitch by making passes and forming loops.